WeldingWeb - Welding Community for pros and enthusiasts banner

Look at my welds. Help.

23K views 70 replies 22 participants last post by  B_C  
#1 ·
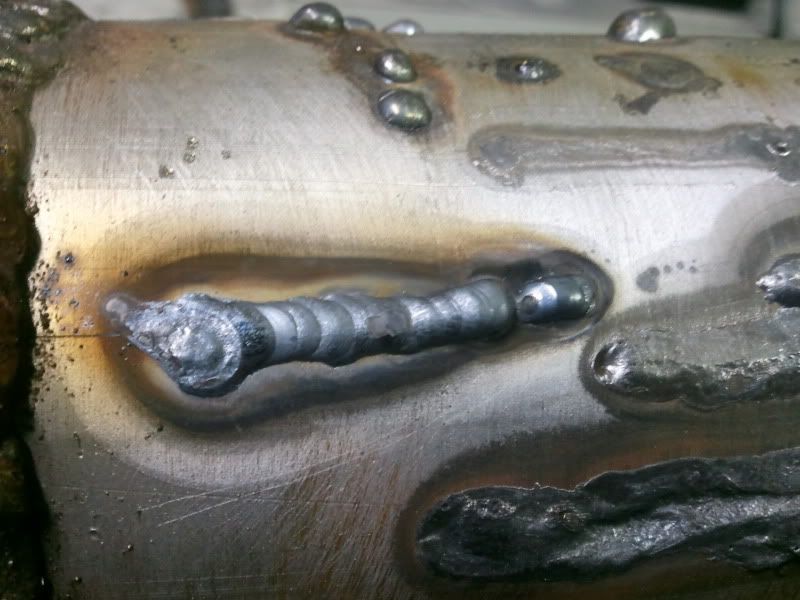
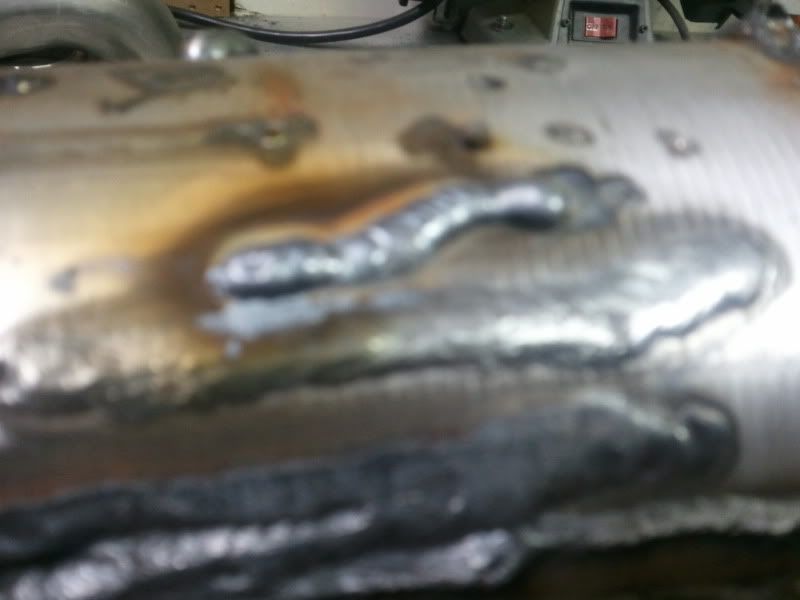
Harbor freight 110v arc with tig attachment. No foot control.
Gas set to 16-18
3/32 tungsten, red tip


Image

Image

Image

Image

Image

Image

Image

Image

Image


Turned the heat down to 40amps and went slower.
Image
 
#3 ·
Gamble, maybe try butt welding two plates together. Get some 1/8 scrap that butts up together, clean the material real well and do a small bevel on each side. Once you figure out heat settings a little better, for the most part (at least for me) my good tig welds are consistant as far as moving the torch and you dip filler like this. - - - - - cleanliness of the metal and consistancy is key when you try and make a nice tig weld, as long as you have the heat right to ensure penetration!
 
#5 ·
I did one piece already and went over the root pass and it turded up a little.
I'm going to home depot or lowes after work to pick up some metal and I'll try this. What thickness should I get?
What kind of gas are you using. Should be 100% argon. Torch angle may be too much on the last half of the weld and bringing in oxygen into the puddle.
Yes it's 100% argon.
 
#7 ·
It looks like you got too cold and didnt wait until you saw a puddle.I would wait a few more minutes and dip and then move slowly and not to close to the puddle. it also looks like you touched the metal.


so how many minutes takes to start a very good puddle? :blob1:
 
#9 ·
and to the OP i would suggest getting some 1/8 mild steel about six inches long and practice on that running a bead with no filler from end to end over and over agian untill you get used to puddle control then after you get that try adding filler get that down before you venture onto anything thinner ...
 
#12 ·
The lack of heat control is going to make learning very difficult.

Some of the welds in the pictures have small sections that look pretty good. The problem is that just before those sections you have overlap (not enough heat) followed by sections were it looks like a wide, uncontrolled lava flow (too much heat - or maybe just how you broke the arc).

To manage the heat you will have to
1) adjust your speed. Start slow, start moving faster.
2) adjust how fast you dip. The addition of filler will actually cool the puddle a little.
3) as you get toward the end of a particular piece of steel, the heat will have no place to go and you will need to go even faster yet (good luck!).
4) On a decent welder, you can get a little more heat by holding a slightly longer arc. If you have your machine maxed out it might not be able to keep up. Longer arc means more heat, shorter arc means less heat.

You might be able to find on the Internet people who have modified that machine to at least give you a remote contactor and maybe even remote power control. Of course to do these things right might ramp up the cost of the machine to the point you could have bought something else instead.

Oh, one last thing about practicing. You are doing what I did and its a bad habit. Practice on a slightly larger piece, flat, and draw lines on that piece. First, just follow a line, next draw two lines and make the puddle stay between the lines. When you weld free hand, I can tell you are not learning how to move your hands. You are doing quick, 3" welds which is probably about how far you can move your hand. I would say 5" minimum. For now, stay away from the edges.
 
#14 ·
Oh, one last thing about practicing. You are doing what I did and its a bad habit. Practice on a slightly larger piece, flat, and draw lines on that piece. First, just follow a line, next draw two lines and make the puddle stay between the lines. When you weld free hand, I can tell you are not learning how to move your hands. You are doing quick, 3" welds which is probably about how far you can move your hand. I would say 5" minimum. For now, stay away from the edges.
Thats the whole reason i suggested the OP to get some 6 inch long pieces of 1/8 and weld end to end making six inch long beads clean the top of the plate with a sander/grinder and some acetone
 
#13 ·
Good stuff. I'll do that tonight and take pics.

Btw I made a tig torch holder. lol I still have to mount it. I was at the store and saw this and got an idea and $2 later.

Image


Squeezed it together and welded it.
Image

Image
 
#15 ·
A couple other things which might help us give you some advice. Provide pictures of your torch tip. That way we can guage your stickout and see how your tungsten is ground. Also, what cup size are you using?

--Wintermute
 
#16 ·
No problem I'll get some pics. I am using a number 6 cup. Sometimes I still get a huge flame coming out of it.
Also side note: Where can I find a how to on back purging setup for stainless with 1 tank? I went to weld something that was SS for my car today and DOH used the wrong rod. So I just made a small hole. All I wanted was a tack. Oh well.
 
#17 ·
Some more of today. I finished off my tank so I can get a fresh one and bigger.
This was all on SS today. I seem to be getting better results with SS for some reason.

Image


Image

Image

Image


My stickout:
Image
 
#18 ·
Just a quick note...grind your tungsten horizontally, not laterally. The grind marks should be straight to the point...

--Wintermute
 
#19 ·
Good Grief!!
All that spatter on your cup is NO GOOD.:rolleyes:

Bad gas coverage will do that..
Crappy material will do that..
No gas and the metal boils and splat's itself all over everything...

Yeah........"Splat"..:laugh:


Looks more like you had no gas at all at times..Or a good wind got in the way..

The metal itself ...Well more time is needed..

Get to BARE metal and clean it good and try again..
These first pics are exhaust tubing and you don't need to start there..As you can see.
Junk metal you find around the house is no good for this without proper and sometimes major metal prep..


...zap!
 
#20 ·
Ok I will grind it the other way. Any good way to clean the cup or the recommended way?
I got some 3/32 filler rod today to try out. All this so far is 1/16th.

I tried welding 2 pieces together and using 1/16th seemed rather small so I got the 3/32. That should be better I think.
More pics tomorrow.
 
#32 ·
Don.t use a grinding wheel on a tungsten unless it is very fine.
A sanding disk is better. About 100 grit.

You can use a 3/32 tungsten from 5 amps up to 150. (Steel or stainless)
It will last longer that the 1/16 tungsten and be easier to sharpen.
From .049 thick metal and up you can use the 3/32 tungsten.
 
#22 ·
What are you welding on? Those dingle berries look like your material is plated or
something that splatters as mentioned........Get some clean cold roll steel to practice on like 1/4 " plate then work your way up to thin wall tubing......Less chance to OVER COOK IT

Image
 
#23 ·
Now, tell me honestly; when you drop a weld that sweet, do you want to have sex with it?:laugh:

Lord knows, I'd be willing to burn some skin.......:blob2:

OP, the answers are ALL good. Wind is a thought also for me/ gas coverage issues. If practicing on SS, then use no filler at first; just get to a clean bead run that is not blacked out. A steady movement forward, pause, forward, pause, etc. Steady. Find a speed that keeps a puddle, and does not cave in or crater or leave thepuddle blackened.
 
#24 ·
Wow that looks amazing. What causes the colors? I got some things going on this weekend so if I have funds I'm going to get a nice wire brush wheel and clean the metal and a nice 1/8th or 1/4" thick plate and go to town on it. Stay tuned for more pics tomorrow.
 
#25 ·
Wow that looks amazing. What causes the colors? I got some things going on this weekend so if I have funds I'm going to get a nice wire brush wheel and clean the metal and a nice 1/8th or 1/4" thick plate and go to town on it. Stay tuned for more pics tomorrow.
The material is at a given temperature when outside air hits it and there is an oxidation that occurs. When it's running too hot, you get black, and volcanic gunk. When it's too cold, you get high beads as in some of your pics, and no real color change. When in the correct heat ranges, you will see some color variations; a lot has to do with speed of weld, and gas coverage. A mig weld will show a rainbow out from the weld in a halo like ring; it shows gas coverage and heat spreading back from the steel. Tig is different because you control the puddle and filler differently as you already know.

Keep practicing; this may take you several bottles to get pretty good with because you have no amp adjustment, and a primitive machine, so arc quality is also going to be an obstacle you will learn to weld around.
 
#30 ·
As mentioned by others.

Wrong material for TIG.
Wrong direction of sharpening of tungsten.
Ceramic cup severely contaminated from aluminized or galvanized material.
You can't beat up a TIG torch like a MIG torch. Won't fly.
Image


The ceramic cup on a experienced welders torch will be unmolested and clean.
 
#34 ·
When i stated out one of my big problems was of course my Shaking Hand. which with time eventually got better. but my other problem was travel speed. I was going to slow and using filler too much. which resulted in high welds similar to what you got there. i forgot what the rule of thumb when it comes to amperage with thickness of metal. When i remember ill post it.
but i would say try not using filler like a machine gun. take your time... work on a steady hand...and when it comes to using the filler rod ...slow down and DAB will the filler like a drip from a leaky faucet. your on the right track tho. Keep up the Good work man.
 
#35 ·
Is there a proper way to clean the cups?
Donald, what do you mean wrong material?

I'll have to get a 100grit wheel for the tungsten until then all I have is a metal disc. I'll get a pic up.
 
#36 · (Edited)
To clean the cup you can just lightly scrape with any tool, but the reason the cup is getting contaminated and getting balls of metal on it is from the coated metal that you are working with.
It spatters and then the molten balls of metal stick to the ceramic cup.
You need to work on clean uncoated steel or stainless steel.

They have MIG filler wires just for working with galvanized and aluminized metals.

You can use a 100 grit flap wheel for sharpening your tungsten, or a flat sanding paper on a bench style sander will work the best.

Normally when you are using TIG (GTAW) you stay away from aluminized or galvanized material because of its spattering properties wrecking your TIG torch.
If you had a gas lens in your TIG torch it would be worse because the molten balls of metal spattering all over it get stuck to the screen and they will not come off.
Those gas lenses cost at least $20.

I give you credit for trying, but working with no foot control makes TIG welding very difficult.
Usually with TIG you have the pedal down at the start and let up as you progress and the metal plate is heating up.

BTW in that last photo the brown stuff can be from gas pressure being a little high.
That piece being welded still has mill scale on its surface and that is making it more difficult.
The metal needs to be sanded to clean shinny surface.
 
#37 ·
That was what I was looking for thank you. I tried the wire brush on the cup but not much luck. Any good way for cleaning the inside, like can I take it off an soak it in anything?
 
#38 ·
just throw the old cup away, get a couple diffrent sizes, they dont cost that much. and get a couple collet bodys too. i allways seem to wreck mine by over tightening the tungsten. and from my experience(just a year with a tig). it is very difficult to learn on a cheap(no offense to you)machine. i bought a used name brand machine for a very reasonable price. budget is a concern of mine, but i got tired of being agrevated by a cheap machine. when i got a name brand machine my welds changed alot for the better. like nite and day.
 
#39 ·
What did you end up going with?
I have been searching locally for a tig welder and I can't find anything that isn't 220 and 30 years old. So I decided to try this and see if I like it. I'll be saving up for something better for sure.
 
#44 ·
i went with a lincoln square wave 175. i love it. its hard to do good welding with a 110 machine (for beginers). when you cant heat the metal up fast enuff, you end up staying in one place too long and that overheats the metal. dont worry if its 30 years old. those oldie are goodies. i would recomend wiring your shop for 220. you will be happy.