
 Reply
ReplyWhere did you get the aluminum plate that is filling the hole? It may be an incompatible alloy.


 Master Welder

Damn dude.
You know, I have very little experience with commercial aluminum, but I've run into problems like this with some aluminum in the past & it seemed nothing I did would make a good weld.
It's too bad Sundown wasn't around these days. He has a lot of familiarity with marine aluminum applications & would prolly know why this is happening. I'm guessing filler & lack or proper shielding is playing a part, but again I'm not a pro on it. I'm just saying this an an armchair opinion, but it would seem that fully grinding out the hole where the plate is & welding almost an open root (heavy V groove in both sides of the plate & hole) with back purge would be the way to go. Without fully purging the back side of it, it's possible this is causing the porosity & cracking. Forgot to add, is both sides of the weldment accessible? I'm assuming so. If that's the case the back side would need to be cleaned, ground out & welded as well. Any time you try to weld over cracks, they almost always come back, or develop somewhere near the area welded.
Did either of the Weldors back purge when making the weld? I would for sure start there. Back purging in this case can be easily accomplished by using a cardboard enclosure duct taped to the inside of the hull & sealed up with a constant flow of argon being pumped into it & a small vent to allow air to escape. The back purging setup we use in the dairy on stainless tubing has an in port for argon to flow into the tube & a small screened outlet to allow gas to escape so it doesn't blow out the weld as its being sealed up. Again, I'm no pro at it, but anyone who is will tell you back purging is a must to obtaining the best possible results. Especially in a case where the weldment is exposed on the side opposite being welded. You want to take all precautions you can to insure the area welded is protected from outside atmosphere. Being that plate prolly didn't fit perfectly into the hole, there were most likely some gaps where air could enter into & contaminate the weld pool.
As far as gear, all Snap On gear is manufactured by someone else. Some of it by CK Systamatics last I knew. I was never impressed with it when compared to offerings of Miller, Lincoln & ESAB. Another thought, you may want to get on the Miller board & consult with FusionKing. He does a lot of marine aluminum & may be able to give you some solid advice if you can't get it straightened out with these guys. Any time you are dealing with old, oxidized aluminum it can be extremely challenging. Even the best preparation can not guarantee a good outcome. In this case, you know the specs of the manufacturers materials used in the building process. That's better than trying to guess what grade of aluminum was used in the vessels construction. Again, I'm only going off what little experience I have with it. I would try consulting with FK, or maybe PM SDIII.
Once again, I may be entirely wrong on this, but I'm going off what I know & what I've seen other ppl do who have considerably more experience than I do. Hopefully someone with specific marine experience can add something tangible to this.
I dunno. Wish I had more to add. Can't wait to see the shiny on it.
Last edited by 7A749; 08-31-2013 at 11:42 AM.
 WeldingWeb Foreman
Where did you get the aluminum plate that is filling the hole? It may be an incompatible alloy.
WeldingWeb Craftsman
7A749, there's a backing plate inside the boat on the other side of that weld, but I'll ask the welder who's coming out today about purging.
ezduzit, the patch is new 5052 plate..
1969 Chris Craft Roamer 46 Refit
Miller TB280 w/Spoolmatic 30a
2016 AHP AlphaTIG 200X
Ancient Millermatic 35
Zeny Cut50 plasma cutter
Master Welder
Ok, that makes some sense. I would still purge if there's any chance of atmosphere getting in there. Aluminum is funny & doesn't always cooperate well. In a case like yours, I would be taking every single precaution I could, especially seeing how its not welding up very well. Argon is cheap in the large scheme of things & sure wouldn't hurt anything back purging.Originally Posted by q240z

Also, if the guy just basically butted the pieces together & didn't V it out well, that small gap is just like a crack & unless is completely melted out during the welding process, stands a very good chance of cracking. You noticed how it cracked right along the center of the weld, could very well be unadequate preperation & penetration are lending cause to the issue here. By the looks of it, there was little if any serious prep done to the joint. I would thought the cap of the final weld would have been wider, indicating the joint has a V shape & is wider on the top than the bottom. How thick is the hull?
If you but weld two plates together, but there's a gap & it doesn't get filled to the bottom, you're bound to have issues.
I'm no expert on aluminum, but have seen it happen many times. V grooving out the weld area allows more surface area to be welded & less chance of an unshielded spot being trapped under the bead, which will cause cracking. Full penetration to the backing plate is imperative. At least in the manner in which I was taught anyways. It even happens with steel if there's a gap or crack underneath the area being welded. When poor quality e pairs are made over existing cracks, it's very, very likely to see the new weld crack in the same place, or immediately adjacent to the original crack because it was not entirely removed prior to welding.
If that gap isn't filled, good chance you're gonna have problems. Im gonna guess at this point the only correct repair is to remove ALL the old weld & start over with a new plug, etc. especially if this dude is saying he thinks the incorrect filler was used. if it were me & anything was suspect, it would be gone simply to eliminate any more trouble. being i know very little about aluminum makeup, etc i would want every advantage possible if I were the one attempting to re-repair this.
Post up how it comes out.
You may want to PM Shovelon. He's a commercial aluminum guy & has a very wide variety of stuff come in his shop. I didn't even think of yesterday. He can direct & advise you better than I.
IMHO of course
Last edited by 7A749; 09-01-2013 at 10:05 AM.
 Master Welder
4043 filler might be the problem. It is too dependent on base metal dilution to achieve any suitable strength. 5356 is a much better choice in my opinion.
Lay it in hot and thick.
Weld like a "WELDOR", not a wel-"DERR"
MillerDynasty700DX,Dynasty350DX4ea,Dynasty200DX,Li ncolnSW200-2ea.,MillerMatic350P,MillerMatic200w/spoolgun,MKCobraMig260,Lincoln SP-170T,PlasmaCam/Hypertherm1250,HFProTig2ea,MigMax1ea.
Master Welder
Sorry to keep adding to this, but the more I think about it, I wouldn't be surprised if improper joint preparation is the key cause of the problem. In example, if you're doing a plate weld with a backer, the backer needs to be completely flush with the plates being welded & the space between the plates wide enough that a proper root can be put in. This is the foundation on which the rest of the weld passes will be laid upon. If it is not correct, it only stands to reason it can essect everything else going on top of it.
You want penetration to be complete, connecting both pieces of the weldment TO the backing plate as well with complete fusion. In some cases, more than one root pass is put in because of the width of the gap being filled. Either way, with the two pieces properly prepared with a V groove, this gives the best possible opportunity to establish the root pass (es) & create fusion between all three pieces. If the backer is poorly fit & gaps exist underneath it at the base of the root, that's a space that could be subject to inadequate fusion & or shielding, possibly causing cracking.
I'm not standing in front of it so I can't say for sure. I'm going on basic procedure & joint preparation standard for any kind of general welding process where plates are joined together with a backer. Most of my experience comes from stick welding, but the same principles apply.
I say cut it all out. Sure, it might not be possible to have a factory "stack of dimes" look with the materials in the condition they're in but again, with unknown filler used & problems going all the way to the root of the original repair, it's best to start over & know exactly what you're doing to it this time around.
Just a thought Q. I know this if frustrating, but how much more so if a half a$$ed job is done & it cracks under the fairing & shiny?
Five times the work & expense to fix at that point.
IMHO of course
Master Welder
Glad you got in on this Terry.
I hope my take on this isn't entirely off track.
Master Welder
No, not at all.
What I see is corrosion and questionable welding. You right in saying that it all needs to be cut out and cleaned. Then butter up the crappy edges, and then fit the patch. Sometimes you spend more time boiling out the crap than actually doing the weld.
I think 5356 filler is not only stronger, more ductile, hot crack resistant, but also more corrosion resistant. That crack up top looks like a tear.
But it is hard to judge without really being there and striking an arc on it. There may be moisture trapped in places.
Weld like a "WELDOR", not a wel-"DERR"
MillerDynasty700DX,Dynasty350DX4ea,Dynasty200DX,Li ncolnSW200-2ea.,MillerMatic350P,MillerMatic200w/spoolgun,MKCobraMig260,Lincoln SP-170T,PlasmaCam/Hypertherm1250,HFProTig2ea,MigMax1ea.
WeldingWeb Foreman
It is surprising that none of the welders, so far, have insisted on this. And it showcases the problems that can develop with owner-supplied materials.
Master Welder
That's good to hear.
If I were looking at this, I would flat out refuse to touch it unless it was agreed the entire thing goes & is replaced by new metal & properly prepared. I would also have taken paint back a good 6"-10" further than the original guy did to insure I could get a clean surface to weld on.
I've used a propane torch to cook crap out of aluminum in the past. I dunno how effective it would be here, but I would imagine at the very least the bitumastic coating, paints & sea water all played a part in oxidizing & contaminating the base material. It would be challenging, even with a Dynasty 350 available to weld it with, I imagine.
I figured 5356 for the filler, but didnt want to state it until someone with more experience commented on it. I have a limited exposure to aluminum, but welding is welding & clean materials, proper filler & correct joint prep are universal components of making a good weld regardless of the base metal or process.
I'm totally with ezduzit on questioning why the guy that showed up the second time would have even attempted to weld over another guys work after a visual inspection clearly revealed major issues & the filler metal used is entirely unknown. I would be either cut it out & replace it from jump street, or I'm not touching it. At least this releases you from any association with the first two guys attempts & gives you a level playing field to work with.
IMHO of course
 WeldingWeb Tradesman
When I worked for the army I had to patch countless hummers that got blown to ****, shot at etc. We used aluminum plates cut to the shape, a liquid gasket for seal and rivets. Then on top of all the we went around the edge with silicon. Never failed. just a thought...
Master Welder
I think if he gets a guy in there who knows what he's doing, takes the time to remove the substandard repair & spends the time to properly prep it all out, it should weld up ok. May have to do some more grinding to get all the crap burned out, but its just a matter of doing it right.
I've heard of a few boats repaired with epoxy & riveted patches that held up just fine too.
With all the money & time he's spent on this boat, nothing less than done right is gonna do. Especially after its faired & painted. It would be heartbreaking to have to break paint to fix it then.
WeldingWeb Foreman
Perhaps this area had been previously attacked by electrolysis or other dissimilar metal issue which compromised the base aluminum's integrity?
Because this repair is at/below the water line, it is important to make it seaworthy. Although a patch could be accumpuckied into place, it likely won't satisfy insurance companies, surveyors and future buyers.
Do it right.
WeldingWeb Craftsman
"How thick is the hull?"
1/4" 5086
"And it showcases the problems that can develop with owner-supplied materials."
I supplied the boat, sheets of new 5052 plate and argon that I bought at the welding supply store. How can I have caused a problem?
The lower end of these exhaust outlet holes are 8" above the static water line. There was some surface corrosion in the area, but the entire boat was sandblasted.
Another welder showed up yesterday. This fellow has built commercial fishing catamarans out of aluminum but now works as a fabricator for the DOD. His comment when he saw the failed patch was "cold and dirty"..."looks like the [previous welder] brought a slingshot to a gunfight."
He recommended cutting the patch out with a router and starting over, including grinding back more of the barrier coat and fairing compound. Because he's working for DOD now, he no longer has his own business. Which means no business costs, licenses, taxes or insurance. And he says he needs $100/hr...cash. I got the distinct feeling he knows I'm over a barrel.
Q
1969 Chris Craft Roamer 46 Refit
Miller TB280 w/Spoolmatic 30a
2016 AHP AlphaTIG 200X
Ancient Millermatic 35
Zeny Cut50 plasma cutter
Master Welder
That sucks.
Cutting it out is best tho. Hopefully this guy will be it. I would have liked to have used a circle cutter & plasma to make a nice round hole, but as long as the patch fits in clean & is ground back to allow for maximum penetration, it should be ok. Most of the time is going to be spent preparing it. If he gets the prep right, the oxidation in the base metal will be the only real challenge. It's pretty straightforward from there.
I don't see that rate as entirely unreasonable, but for that price I hope he is bringing a Dynasty in to weld it with. If he just planned on using your spoolgun & machine to do it, I wouldn't be to crazy about it then.
IMHO of course
Good luck with it man.
Last edited by 7A749; 09-02-2013 at 08:26 AM.
WeldingWeb Craftsman
I cut out the old patches yesterday and left the hole for the welder to grind to size. I'll post pix of the patch I cut out later. There's something odd going on there that I can't figure out.
In other news, I cut window patterns over the weekend. It'll be nice to finally have the boat weatherproof, though delivery of the aluminum framed windows will take 6~8 weeks. I also made a bow pulpit for the anchor roller I'm installing on my other boat.
1969 Chris Craft Roamer 46 Refit: Window Patterns
Cheers,
Q
1969 Chris Craft Roamer 46 Refit
Miller TB280 w/Spoolmatic 30a
2016 AHP AlphaTIG 200X
Ancient Millermatic 35
Zeny Cut50 plasma cutter
WeldingWeb Craftsman
Gotta take abreak from bad news welders...
We're getting closer to having the paint phase of this refit done every day. My latest blog article is on taping off the boat for the non-skid. Once we paint that, we're about three "paint days" from being done.
1969 Chris Craft Roamer 46 Refit: Prepping for non-skid
Cheers,
Q

1969 Chris Craft Roamer 46 Refit
Miller TB280 w/Spoolmatic 30a
2016 AHP AlphaTIG 200X
Ancient Millermatic 35
Zeny Cut50 plasma cutter
WeldingWeb Foreman
One cannot overstate the amount of preparation that preceded those final 3 paint days, which are just the last few strokes. Attaboy.
WeldingWeb Craftsman
You said it, ezduzit.
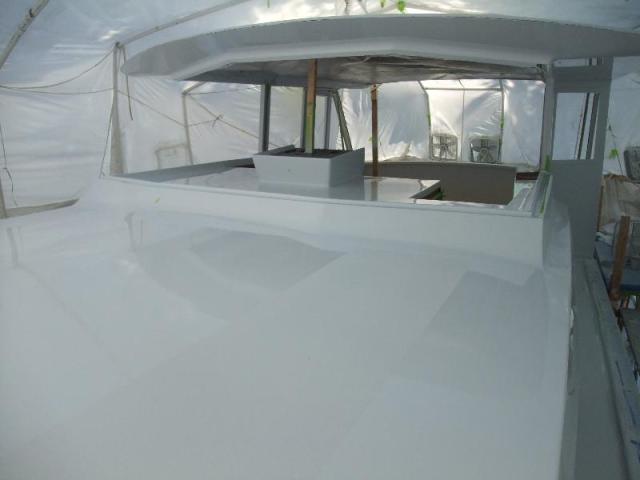
The boatamalan painter called the other day around 8:30AM...said he was just leaving the tent, having sprayed the non-skid...that wasn't scheduled to be sprayed until this weekend.
Gotta love the Boatamalans.
1969 Chris Craft Roamer 46 Refit: Non-skid!
Cheers,
Q
1969 Chris Craft Roamer 46 Refit
Miller TB280 w/Spoolmatic 30a
2016 AHP AlphaTIG 200X
Ancient Millermatic 35
Zeny Cut50 plasma cutter
WeldingWeb Craftsman
The paint work from the rub rail up is done! This weekend, we're finishing up the fairing on the hull and then spraying the final coat of Awlgrip 545 primer. This Roamer will be painted top to bottom by next weekend!
1969 Chris Craft Roamer 46 Refit: The Shiny Out to the Rub Rail
There was also another hiccup with a highly paid contractor whose work I had to go back and re-do. What in the heck is going on with America's work ethic? Or am I just the unluckiest man alive???
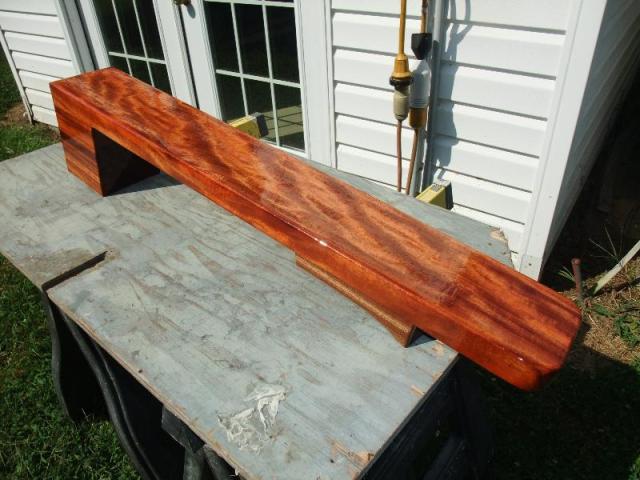
1969 Chris Craft Roamer 46 Refit: Re-bunging the Mahogany Toe Rail
Cheers
Q

1969 Chris Craft Roamer 46 Refit
Miller TB280 w/Spoolmatic 30a
2016 AHP AlphaTIG 200X
Ancient Millermatic 35
Zeny Cut50 plasma cutter
WeldingWeb Foreman
The workman needed more and better supervision. An inexcusable job of drilling the holes.
WeldingWeb Craftsman
Actually, ezduzit, the counterbores were all OK (though the original woodworker drilled them a wee bit deeper than I might have. The only real problem was the inadequate glue line.
You raise an interesting question though, that also applies to the trouble I've had with very expensive weldors...if you have to babysit a guy to make sure he does the job right, is he a journeyman?
1969 Chris Craft Roamer 46 Refit
Miller TB280 w/Spoolmatic 30a
2016 AHP AlphaTIG 200X
Ancient Millermatic 35
Zeny Cut50 plasma cutter
Master Welder
It's looking awesome Q.
Hope you get a quick solution to your other issue.
Got some catching up to do on this now
WeldingWeb Craftsman
No pressure, right? lol
Q
1969 Chris Craft Roamer 46 Refit
Miller TB280 w/Spoolmatic 30a
2016 AHP AlphaTIG 200X
Ancient Millermatic 35
Zeny Cut50 plasma cutter
Master Welder
Naaawwww.
Just another day in the office after all the BS you have dealt with on this boat.
You'll prolly want to be buried in it after all this. I know I would

Posting Permissions
