
 Reply
ReplyI found my some stainless bungs on Amazon, but I have some local places (hardware stores, but not big box) that have them too.


 Master Welder

Gravel
The difference between theory and practice is that in theory there is no difference.
 WeldingWeb Artisan
I found my some stainless bungs on Amazon, but I have some local places (hardware stores, but not big box) that have them too.
Regards,
Rob
Great Basin Welding
Blue welders
Red welders
My luscious Table
DIY TIG Torch cooler
 WeldingWeb Foreman
Can someone tell me what size/kind of fittings a Procon pump uses?
WeldingWeb Tradesman
No but the shurflo pumps are 3/8" npt.
The B size LH thread adapters from Western are here:
http://www.brwtechnologies.com/mobil...ductCode=A-405
Home depot sells 1/4" to 3/8" adapters
WeldingWeb Tradesman
I have not figured out what sort of panel mount hose fittings will work though. I would like to oversize them to avoid any added circuit resistance.
WeldingWeb Artisan
That was the hardest part for me.
Regards,
Rob
Great Basin Welding
Blue welders
Red welders
My luscious Table
DIY TIG Torch cooler
WeldingWeb Tradesman
MikeGyver has some snazzy quick releases on his; I will dig back through the aluminum cart thread.
 Supporting Vendor
I used quick-release fittings from HTP---work great on the HTP Arctic chill cooler. I have the old fittings saved in a plastic baggie if anybody needs fittingsOriginally Posted by atg

 Master Welder
231 Cubic inches per US gallon. A cubic foot is 1728 Cu In 1728/231= 7.48051948051 Gallons Any rectangular tank is in inches L x W x H /231= gallons. Cylinders is Radius x Radius x 3.1416 x length/231= Gallons.
The one recommended for my Dynasty 280 DX is 1.3 gallons.
The coolant used sells for $30 per gallon. Don't go with a huge tank.
For a while I used sink water. My flow rate was about 3 gallons per hour. It worked fine. That's what Zapster's machine uses all the time.
Last edited by Willie B; 09-04-2014 at 09:26 PM.
Master Welder
Yeah, for some reason I keep swapping gallons/sq ft and pounds/gallon...
Gravel
The difference between theory and practice is that in theory there is no difference.
WeldingWeb Foreman
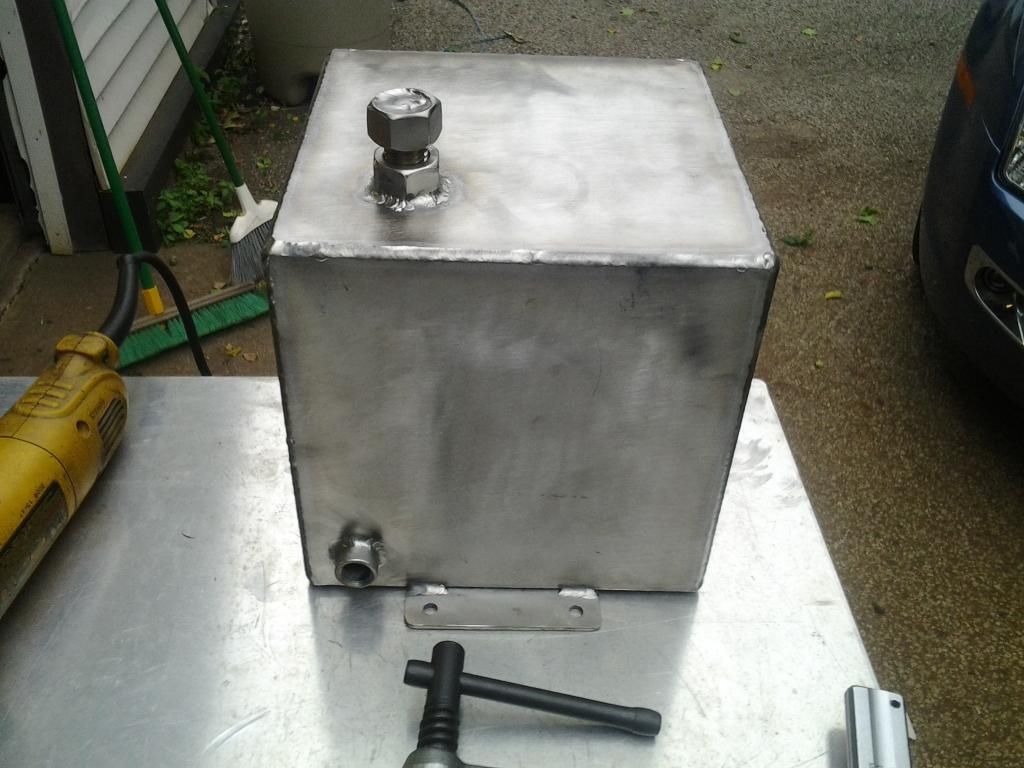
Got the tank built today. Went 8" X 8" 11 ga. stainless. Worked out OK. I started walking the cup using 4043 1/16" filler rod..........switched to freehand.........ended up just freehand and fusing the corners. Using open corners this worked out well.
The first pic shows all sides (except for the top) tacked on the inside this allowed me to fold up all the sides making things pretty accurate.
The 3/8" bungs are actually a cast stainless pipe coupling cut in half.......worked out real cheap. The cap is a 3/4" nut and bolt.
I am leak testing it overnight.
Last edited by rahtreelimbs; 09-06-2014 at 07:43 PM.
Master Welder
Nice job! Sorry I haven't been able to talk. You can call me any time this weekend.
Gravel
The difference between theory and practice is that in theory there is no difference.
 Master Welder
Looking good....**** if I can get some stainless sheet I may tackle this one too just for fun.
Torchmate 2x2 CNC with Flashcut CNC controls
Hypertherm Powermax45
Esab ET220i
Razorweld 195 Mig
Razorweld 200ac/dc Tig
Tormach 770, Tormach xstech
Carbide3d Nomad3
Sherline 4400 CNC Lathe
 WeldingWeb Artisan
Looks great RTL
TA Arcmaster 300
CM3
XMT 304
S22P12 suitcase feeder
X-Treme 12VS
Optima pulser
TA161S
Maxstar 150STL
Hypertherm PM45
OP setup
Stihl 020AVP, 039, 066 Magnum
 WeldingWeb Foreman
4043 filler? Typo, or welding genius?
 WeldingWeb Craftsman
It's the non-ferrous stainless filler rod. You've never heard of it?
OP, sweet project
Teach Ag Mech - Mike
At Home:
Lincoln Electric AC225
Miller Challenger 172
Gas Axe
Work:
eclectic bunch of 90's vintage blue boxes
WeldingWeb Foreman
Had aluminum on the brain. ....meant to say 308 stainless.
WeldingWeb Artisan
I have two coolers. One is a Bernard 2500 that I rebuilt. It has a radiator and a 6" electric muffin fan since the new Procon drive motor had only one shaft. The original motor had a fan with a dual shaft motor but it wore out so I just used the single shaft motor with a fan. It works great.
My other one is home-built with ah 1/8" Wall SS tank. I made it too large (15 gallon) but I never run more than 5 gallons in it. It's also got a Procon pump and motor. There is no radiator and it has never needed one. You could weld all day with my Syncrowave 200 and ithe coolant would never even get warm. If I were to build another one, I'd make it no larger than about 5 gallons. That's all that you really need.
I formerly used Miller Coolant but gave up due to the cost. Nowadays, I use distilled water with a quart of GM Dex Cool. I've yet to have a problem. There are pressure gauges on each unit and they run 50-60 psi. That seems to be OK since I've yet to overheat a torch in more than 15 years.
I built the carts out of bed frames. The picture was when I was testing both units. I alternate them now and change them from time to time.

Last edited by gnm109; 09-13-2014 at 08:02 PM.
Miller Millermatic 252
Miller Syncrowave 200
Bernard Cooler
Lincoln AC-DC 225
Victor O-A Set
High Hopes.
WeldingWeb Apprentice
Very small foot print. It fits underneath the welder on the portable cart.
Some of the ones I see above, you'd need a separate cart to haul them around.
WeldingWeb Foreman
This is where I am at now. I have the the shroud mount built and the base as well as the tank. All I need now is the pump and motor.
I am mounting this on a separate cart......this is the reason for the dinse and gas line connection on the front of the panel.
I guess my aluminum welding is getting there.
.
WeldingWeb Apprentice
I ran my machine for years on a total loss system.... I rigged a regulated water source, connected to the machine and out to the flower beds. I ran the water pressure at a point where discharge water was slightly warm when welding at a high setting.
It worked fine and had zero issues.
WeldingWeb Apprentice
Looks like a cool setup for a converting an small aircooled rig to liquid.
WeldingWeb Craftsman
Lets say you have the sheet metal to make the liquid tank but have to buy everything else.
How much time and $$$ is spent making your own?
there are chineesse tig water coolers on ebay for $375, they are the same ones that everylast and longevity sell.
Help me determine what savings if any are achieved by DIY?
WeldingWeb Apprentice
You might want to move that fan out to were the blades are even with the shroud. The blade location were its at now; will make noise and chop air but not really move a lot of air. You could remake the bracket and flip the fan over so that the blades are level with the shroud since the direction of air flow make no difference.
WeldingWeb Foreman
Thanx!!!
Posting Permissions


