

 Reply
ReplyThanks!Originally Posted by wagin

If I remember correctly, this gate was somewhere around $650-750 maybe a smidge higher or lower.
I didn't charge enough back then.....


 WeldingWeb Foreman

If I can ask what you charged for this gate, installed? Trying to price my local market correct.
Miller TrailBlazer 251
Miller HF-250-1
Miller MaxStar 150 STL
HyperTherm PowerMax 380 plasma
Lincoln PowerMig 180
Millermatic 252
Miller Diversion 180
 WeldingWeb Artisan
Thanks!
If I remember correctly, this gate was somewhere around $650-750 maybe a smidge higher or lower.
I didn't charge enough back then.....
 WeldingWeb Foreman
I see, when you said bender I thought you meant roller but hadn't considered that you were making increments and making slight bends, looks really nice! I bet the math for the spacing and bend degrees/figuring for springback was fun, haha. We use the HF roller for radiusing tubing, there's really not much of the original roller left though. Rather than do the add on wings we made new bigger sideplates for it and went with a bottle jack for the downfeed instead of the screw. Driven with a HF pipe threader we rolled 1/8" wall 2" square tube to a 7' radius.
WeldingWeb Artisan
Wow that's a tight radius for 11ga! How tight do you think you could get 14 or 16ga?
I added wings to my roller, but I just need to buy some more dies from swag, I only have a 1.5" square tubing die, along with the stock dies
And using the incremental bending, is more like guesswork than math.... Haha
WeldingWeb Foreman
The problem with 14ga is once you start trying to go that tight it starts to crinkle on the side that's trying to shrink. We were planning on using it for that project but had to go to 1/8" to roll without crinkling. We cobbled together some dies using the the existing HF ones, with a few add-ons. We have them pinned to the shaft with 5/16" roundbar but rolling stuff that tight will shear through the pin after a while.
WeldingWeb Artisan
Yeah that's a problem, that's why I use a section of pipe for my inner die, it crimps the inside of the tubing and prevents it from messing up the sides.
WeldingWeb Artisan
Here's an arbor I made a couple months ago, using the same method of bending the curves:
I did the arbor to match the existing pool fence
This thing was heavy, I built the top curved section separate and assembled it on site. Had it powder coated too
Last edited by MetalMan23; 02-04-2016 at 08:05 AM.
WeldingWeb Journeyman
Nice work Phil, the arbor look real nice
Solderer
Awesome work. I've always want to do stuff like that. I oils like to try and do some scroll work.
Sent from my iPhone using Tapatalk
WeldingWeb Artisan
Thanks!
WeldingWeb Artisan
Thanks, I usually buy pre-made scrolls and make them fit, but the gate I'm working on now I made all the scrolls from 1/4" round bar.
I made a scroll bender jig, just for this job. I'll take some picture's of it tomorrow when I get to the shop.
Here's the gate after I painted it today:
I twisted the pickets too, I have a cool machine I use for twisting pickets, I'll take pics of that too
Solderer
I would like to make some tools. ( when time permits) I was doing tool and die for 16 years now running a Cnc mill. I'm also a welder. My brother in law runs a haas Cnc lathe right beside me at work. We have access to a full fab shop with Cnc breaks and lasers. So I capable of making tooling just so busy! My brother in law and I would like to start our own shop some day soon. But the stuff you do is great and masterful and artistic.
Sent from my iPhone using Tapatalk
WeldingWeb Artisan
Thanks,
Yes you have the equipment available to make some tools, I'm looking to buy a lathe, so I can make dies and stuff. It'll help me with my ornamental stuff.
Snow today, so it'll be a little slow
WeldingWeb Artisan
Here's some fencing, with a matching gate, I never got a good picture of the gate.
Here's some smaller miscellaneous jobs:
Last edited by MetalMan23; 02-05-2016 at 03:01 PM.
WeldingWeb Artisan
Oh yeah, check this out, it's an entertainment center. Steel frame, cherry shelves, and stainless cables and hardware:
I used 1" square tubing 16ga for the frame, and 1/4"x2" for the vertical straps.
Here's the frame hanging in my shop, after painting
Mounted on the wall, with stainless hardware and wood shelves attached:
And here it is with the TV and other stuff all set up:
This was a pretty cool project, the interior designer basically gave me an idea, and I had to design and fabricate from scratch. Also adding a wood element really increased the difficulty.
I wanted it to look like it was suspended from cables, kinda like a bridge.
WeldingWeb Artisan
I make a lot of custom strap hinges for a fence company I work with.
I weld the 'badass' ball bearing hinges to the strap, to make hinges that are rated for like 1500-2000lbs
WeldingWeb Artisan
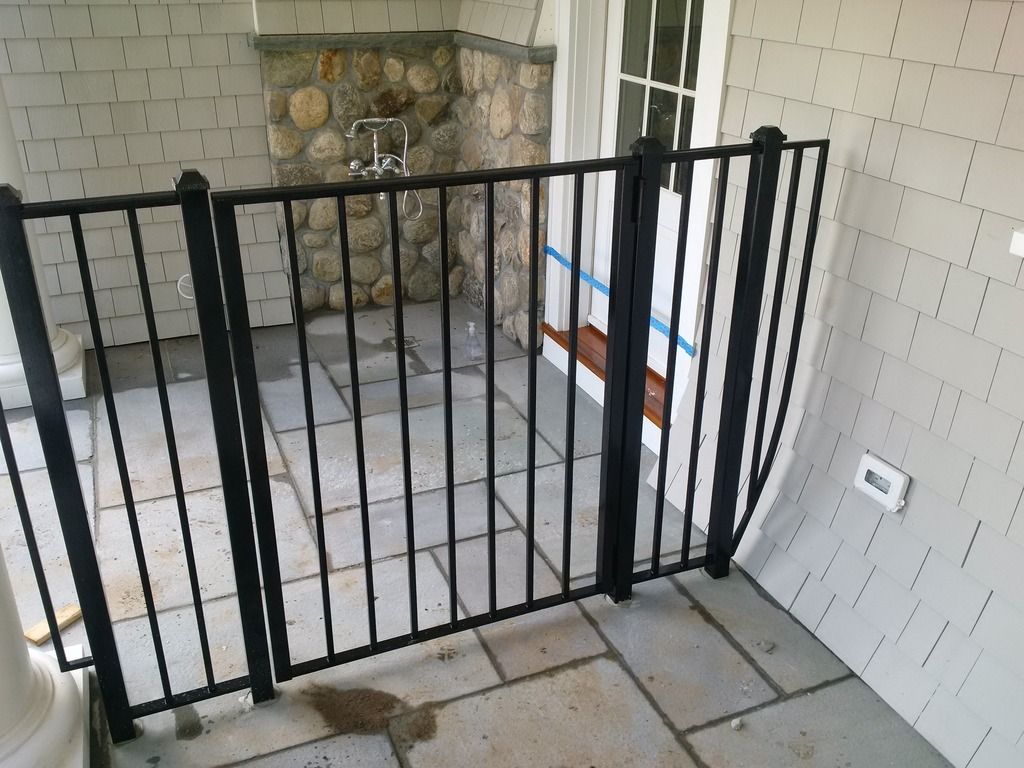
Here's a gate I put into a bluestone patio, after I anchored it in, the guy I was working for realized he told me the wrong location. Lol so I had to take it out after I took some pics,
I told him his guys could re-drill the holes and anchor it, it was Friday and I was going to newfoundland the next morning.
WeldingWeb Artisan
So you guys can see I do a lot of railings, I'm finally figuring it out after being in business since late 2012
Hope you enjoy the pics
WeldingWeb Artisan
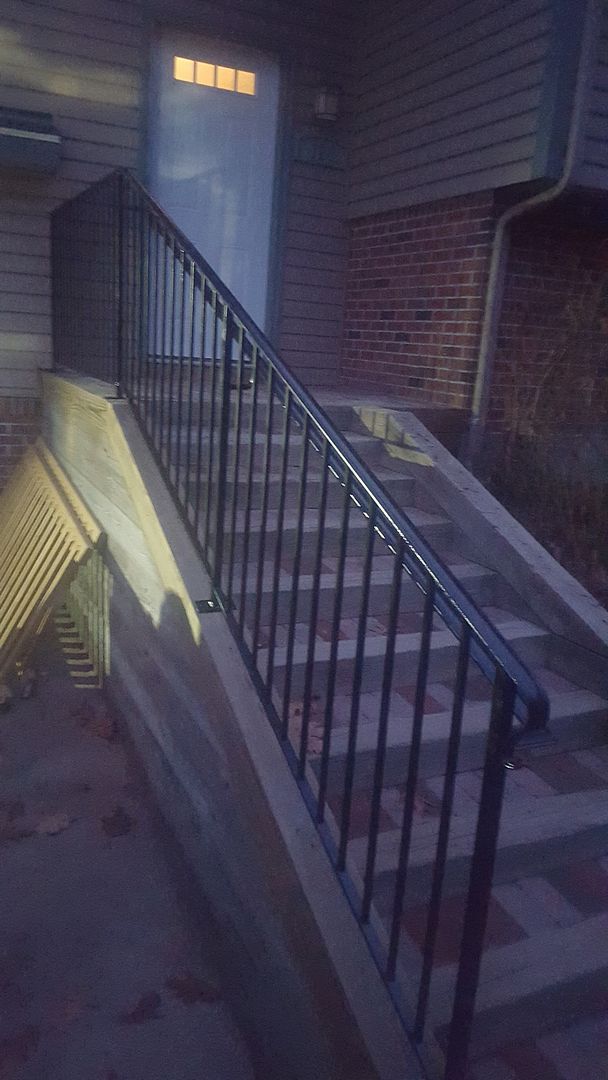
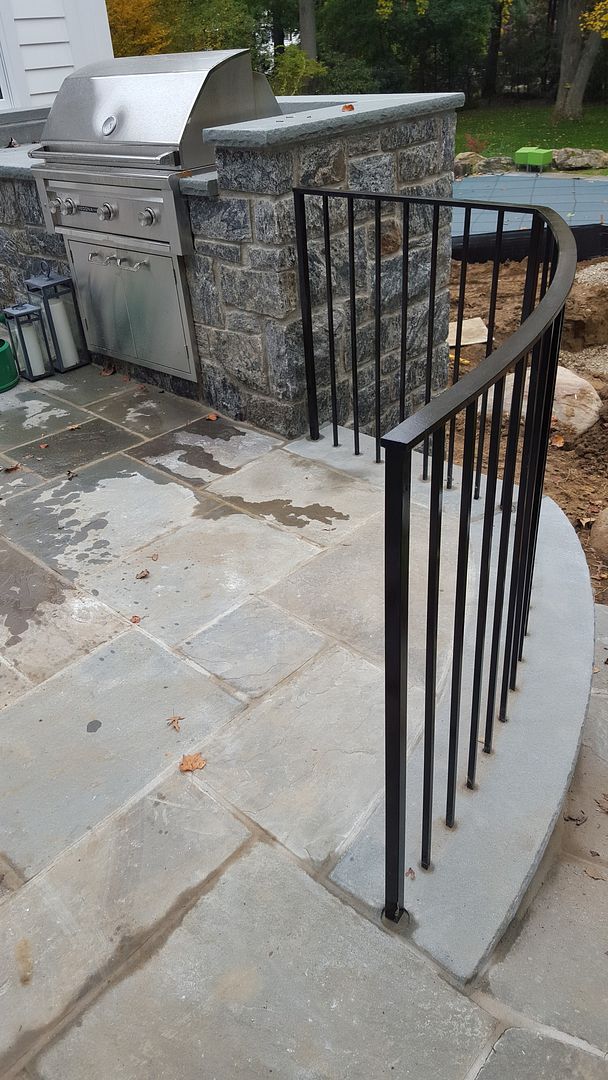
Here's one of the most complicated railings I ever fabricated, just because the lack of a bottom rail, took me way longer than it should have,
They wanted all the pickets drilled into the bluestone, and a radius to boot.
WeldingWeb Artisan
Don't look too closely at that last pic^^^ you might see that the posts aren't perfectly level. 😎
WeldingWeb Craftsman
Wow,
Brilliant work, dude!
WeldingWeb Artisan
Thank you sir, I'm just trying to make a living.
But I like to work for the people that are willing to pay for my attention to detail, and the quality of work that I do. I hate doing the cheap simple stuff, it's not as rewarding.
Master Welder
Nice work. How did you jig and transport that last rail. I find it difficult to fab and handle any rail without a lower horizontal rail.
WeldingWeb Artisan
I bent a piece of 1/2" square at the same radius as the top rail and rested the pickets on top while fabricating and just tacked them to it (a really small tack). So when I got to the job, I marked each picket hole, drilled, and then twisted the bar off with an adjustable wrench, and it slid into the holes.
The top rail was just my normal 1"x1/2"x1/8" punched channel. Bent to a template.
It was a pain to get all the pickets in at the same time though lol. But it definitely looked pretty cool when it was done.
WeldingWeb Journeyman
great railings!
Posting Permissions


